OnTime is equipped with the ability to export transactions to QuickBooks. To utilize this feature, you need to give OnTime permission to send data to QuickBooks. If QuickBooks does not automatically prompt you for permission in a window, you'll need to manually configure QuickBooks to allow OnTime. If you see a message indicating that “QuickBooks could not be started”, that “QuickBooks is not installed”, or that “OnTime could not find QuickBooks”, try the below steps:
Note: You will need to have administrative access to QuickBooks to adjust some of the settings below. If you do not have that access, contact your QuickBooks administrator to change these settings.
- Start QuickBooks and load the desired company file.
- Open OnTime Management Suite and attempt to post an invoice or payment to QuickBooks.
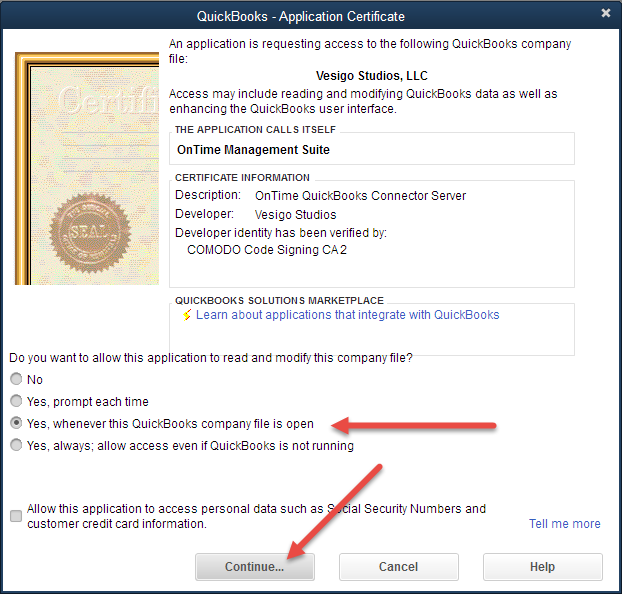
- A prompt window should appear. If it does, select the option Yes, whenever this QuickBooks company file is open and click Continue.

- If you still have trouble posting to QuickBooks or the window shown above does not appear, close all programs and restart your computer. Sometimes rebooting will help clear out cached settings in QuickBooks that prevent third party programs from connecting properly.
- After restarting, open QuickBooks and the desired company file.
- In QuickBooks, select the Edit menu and choose Preferences.
- Select the Integrated Applications section.
- Select the Company Preferences tab.
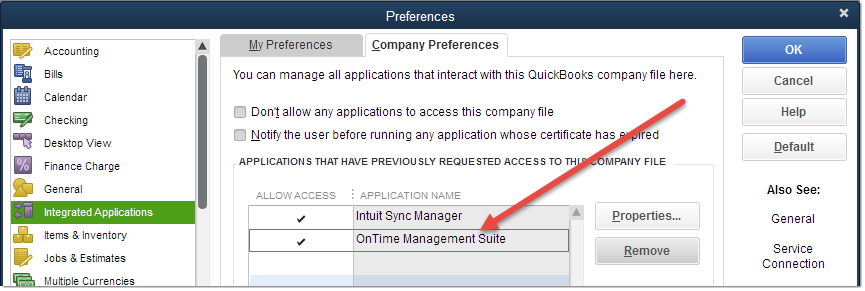
- Ensure that the check box labeled Don’t allow any applications to access this company file is unchecked.
- Ensure that there is a check mark next to the OnTime entry in the list box:

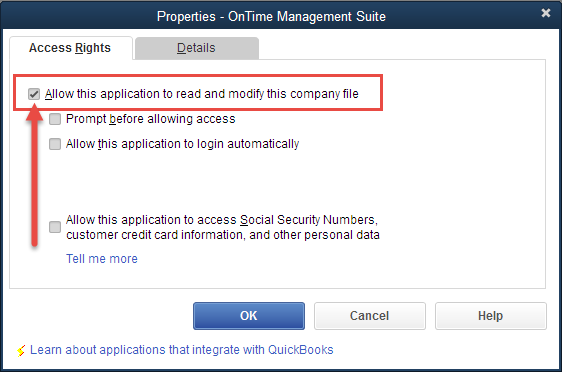
- With the OnTime entry selected in the list box, click the Properties button.
- Ensure that access rights are selected:

- Click OK to save the changes in QuickBooks and close all windows.
- Attempt to post an invoice or payment from OnTime. If still unable to connect, contact our support staff.